

Cover Furniture Scratches Easily the DIY Way
This week, our Jill of All Trades, Jill Washburn, shows us how to cover surface scratches on furniture. Jill often buys used furniture and it’s not uncommon for them to need a little TLC because they’ve been bumped around and scuffed a bit. Often, she paints or repaints pieces, so she's less concerned about scratches showing. Sometimes, though, the finish of a piece still looks pretty good and she just needs to hide a couple of scratches. Here are a few of her favorite ways.
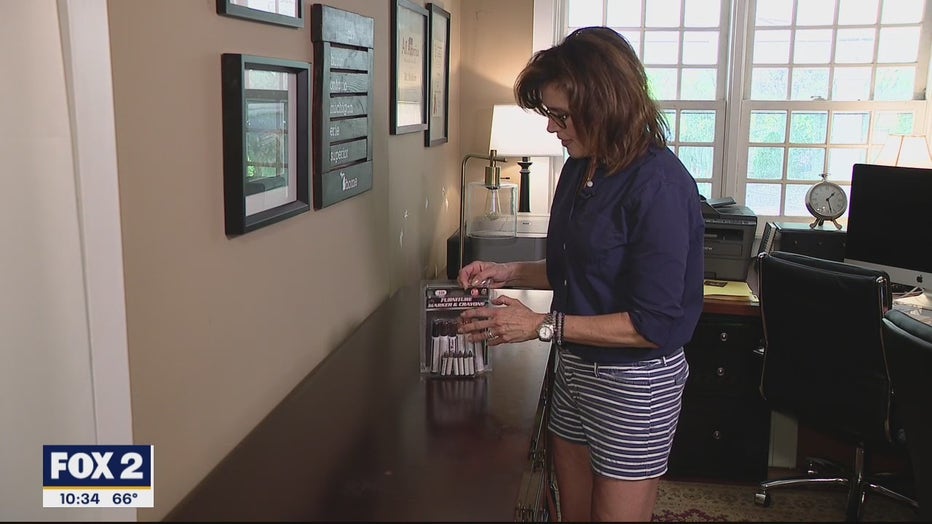
You can touch up furniture with markers intended just for that purpose.
The newest trend in covering scratches is using furniture markers or crayons. They are really just normal markers that come in a variety of colors to match the most common furniture finishes. Jill had tried the crayons with minimal success. For the pieces she tried them on, she found the colors to be not saturated enough and difficult to actually get down into the scratch.
Jill found the markers to be somewhat easier to use, since they are wetter than the crayons and can get down into the scratches a little easier. Still, she was somewhat disappointed with the limited results. Keep in mind that there are many variables with furniture scratches and scuffs, so what may not work well on some pieces might work great on others. Jill did have some success with "layering" multiple colors of the markers to achieve the desired color on some pieces.
Two things that Jill used worked surprisingly well. The first is an old, old method that still delivers solid results. It’s using a walnut. Yep! You read that right. The meat of a shelled walnut, when rubbed on furniture, released a healthy amount of oil and that will help hide scratches on a piece of furniture.
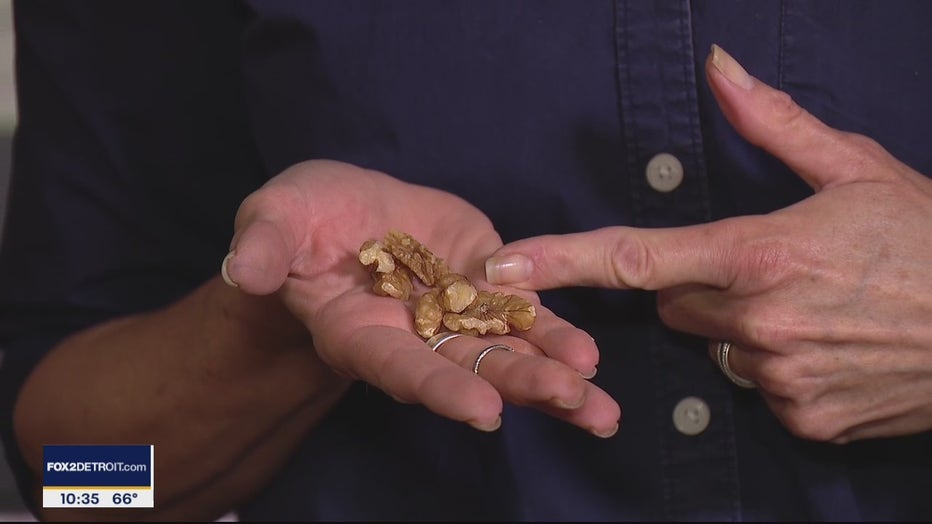
I have actually used walnuts as a furniture finish touch-up.
The walnut will most likely start to crumble as you rub it into the scratch. Just keep working it into the damaged spot. The oil was surprisingly light in color but it went a long way to hide scratches on a dresser that Jill had with multiple scratches and scuffs.
When you think of walnut furniture, you think of something that is a fairly dark brown. But, that is because of the color of walnut wood. The oil that comes out of a walnut is closer in color to the walnut meat, not the walnut wood. Because of that, you can actually use walnut meat to erase scratches on lighter pieces of furniture, as well.
The product that gave stellar results on a couple of pieces that Jill worked on recently is a product that’s been around for decades called Old English. Old English is a heavily tinted fluid made for covering scratches. It comes it two tones, one for light furniture and one for dark. Jill got really good results with the dark Old English on the top of the dresser she was working on. She also used it on a desk that had a fair amount of scratches concentrated in one spot from heavy everyday use. The Old English for dark furniture brought the top of the desk back to a nearly new appearance.
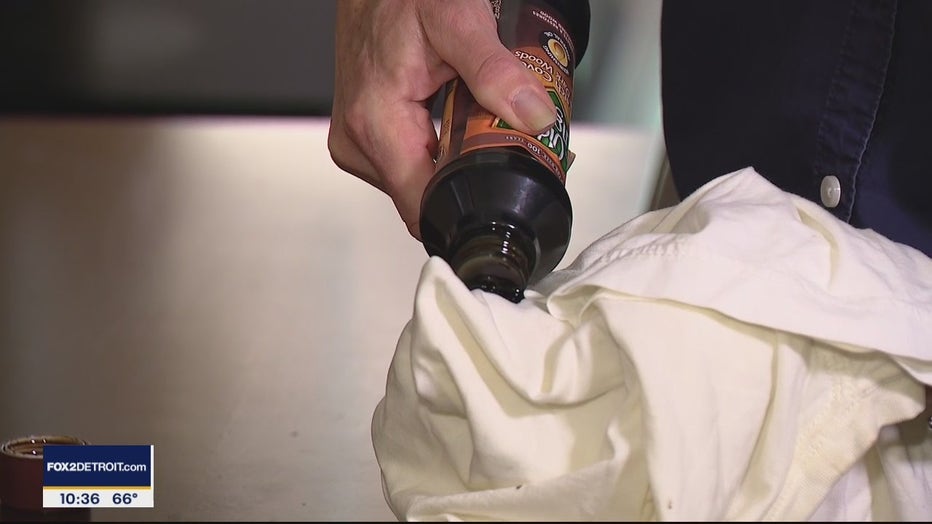
Old English is a product that has been around for decades.
To use Old English, make sure you shake the bottle thoroughly, then pour some of the fluid into a soft cloth (like an old T-shirt) and gently rub it into the scratches. Once Jill has the scratches covered, she goes over the entire top of the piece, using Old English almost like a polish. After it dries a bit, she comes back a gently buffs it up. The results are really solid, says Jill. It gives new life to some tired pieces. It can make you love your furniture again. Another plus, Old English is very affordable and easily available, both online and at your favorite retailer. It can be found at hardware stores, grocery stores, big box building stores, and big box discount stores.
If nothing else, Jill says, these tips can save you from completely refinishing a piece, or at least buy you a little time before you have to tackle that project.
PROJECT RATING: Super Easy
To watch Jill take you through the options, just click on the video player above.