Tips for fixing up a warped fence gate
(FOX 2) - This week, our Jill of All Trades, Jill Washburn, tackles a couple of fence gates that have warped over time.
The warping of the gates had created gaps big enough for Jill's smallest dog to sneak out of the yard. While, eventually, the aging gates will have to be rebuilt, Jill decided that there was a stopgap measure that would buy her some time, for now. What she decided to do was pull the gate back into line, using some vinyl coated steel cable and some turnbuckles.
Jill of All Trades fixes up a warped fence gate
In this episode of Jill of All Trades, she shows us how to tackle some fence gates that have warped over time.
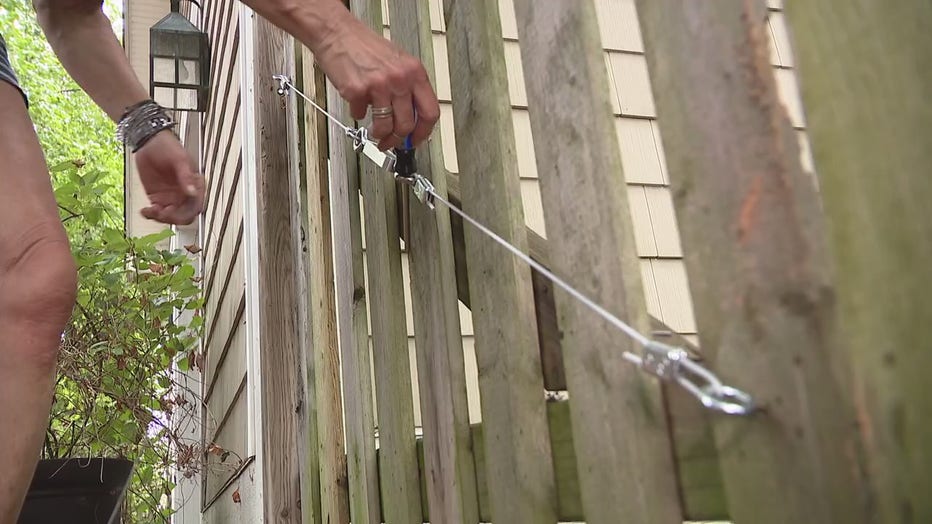
Jill started with identifying which two opposite corners on each gate needed to be pulled in in order to get the gate back in line. Once Jill had identified that, she put a heavy duty eye-hook into each corner of the gate. Jill started by drilling a pilot hole and then twisted the eye-hooks in.
Once she had that done, she went into her workshop to assemble the brace that was going to pull everything back into line. Using a fairly heavy-duty turnbuckle, Jill assembled the brace. She extended the turnbuckle out as far as it would go and then she attached lengths of vinyl coated steel cable to each end of it. To clamp that down, Jill used steel screw on cable clamps, one on each end.
With the brace manufactured, it was time to take it outside and install it on the gate.
Jill suggests that it's best to try to keep the turnbuckle fairly centered along the expanse of the gate, but it doesn't have to be perfect. Before you install the assembly to the gate, make sure that both ends of the turnbuckle are adjusted all the way out, says Jill.
Jill then set about attaching the brace to the gate, first through one eye-hook, and then the other. At each end, she fed the cable through the eye-hook, then folded it back and secured it with a screw-on cable clamp. There are other options available, but Jill found the screw-on type easiest to work with. When you get to the final end, you're going to want to get the cable as tight as you can. You want to have minimal slack.
Once you have the brace secured on both sides, it's time to start turning the turnbuckle. It'll turn easily in the beginning, says Jill. Eventually, though, as it starts to tighten, it'll get tougher to turn.

At that point, you may need a helper. And you may not be able to turn it by hand any longer at that point. Jill says you can insert a screwdriver in the center slot of the turnbuckle and use that as leverage to help you turn it.
As you tighten it, it may not bring the fence into line entirely right away. Jill says that you have to think of it more like braces, or a retainer, that will help pull the gate into line over time. It may take a couple of weeks. You will probably want to come back every couple of days and turn the turnbuckle a little tighter. Jill especially recommends doing this after a good rain, when the wood is saturated and more pliable.
Once you have the misalignment corrected, Jill recommends just leaving the brace in place, to keep the gate that way. That is why Jill put the braces on her gates on the outside of the gates, so that dogs jumping at the gate would not be able to get their paws tangled in the cable.
PROJECT RATING: Medium
To watch Jill take you through the process, just click on the video player above.

