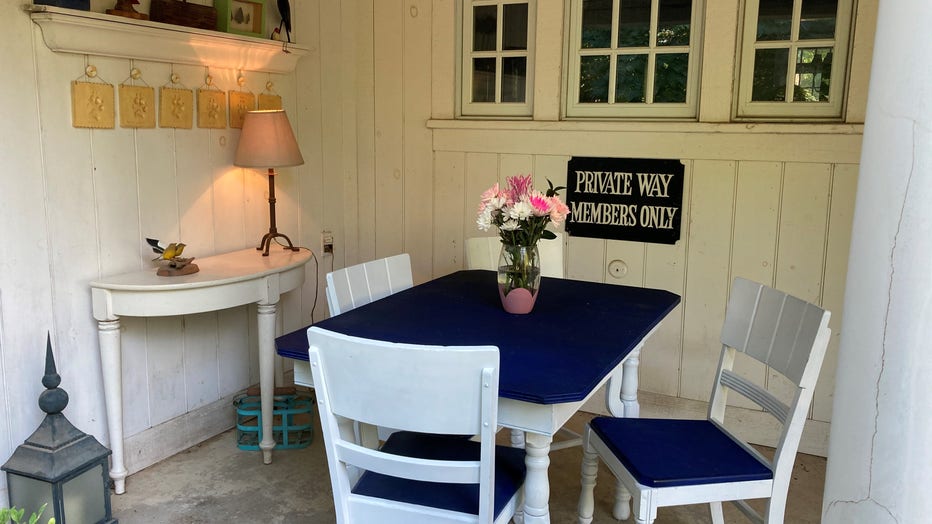
Tips for refurbishing a rundown table
(FOX 2) - This week's project is Part 2 of the abandoned table and chair set. Our Jill of All Trades, Jill Washburn, turned her attention to the table so that she could get it to look as good as the newly-renovated chairs.
The table was in rough shape when she found it. The legs were loose and wobbly, which was easily corrected with the addition and replacement of some heavy-duty screws.
The main problem, though, was that the table top would not stay together. The table must have originally had a leaf. The leaf was missing, which was not a problem in and of itself, but the seam in the middle of the table opened up anytime the table was moved or even jostled a bit.
For Jill, this was an easy fix. She flipped the table over and installed window latches on the underside of the table, at the seam. She use the same half circle latches that are used on double hung windows. They are easily found at hardware stores or the big box building stores for just a few dollars.
Jill placed half of the latch on one side of the seam and the other half of the latch on the other side. She lined them up and pencil marked where they should go. Then she carefully pre-drilled the holes for the screws. Jill cautions that you have to be careful and stop before you go all the way through the top. You do not want to have holes can be seen on the surface.
Because window latches are made for window sashes that don't completely lineup, you will probably have to boost one side of the latch when you're using it on a completely level surface. Jill used a cork washer and a metal washer under each screw on the half-circle side of the latch. That was enough to bring both sides of her latches level.
The latches will now keep the table closed all the time, but they give Jill the option of opening it up again, if she should decide to make a leaf that will fit and expand the table.
With table repairs complete, Jill turned her attention to making it look a little better. That meant it was time to paint.
Jill started out by flipping the table over and painting the legs first. Because the wood was so dry, and had been left out in the elements so long, it took a few coats of paint to adequately cover the table. Once Jill had the legs painted (white to match the chairs) and dry, she flipped the table back upright and started working on the top.
Again, like the chairs, Jill painted the top a deep blue that was a little too bright. She toned that down by lightly over-spraying it with black. That deepened the blue to more of a navy, which was the color Jill was aiming for.
One of Jill's tricks for painting the top of the table was to lean an over-sized piece of cardboard against the side of the table, making sure that it went right up to the underside of the top. This allowed Jill to spray paint the table top without getting any paint on the legs and it saved her from having to mask everything off with tape and plastic. Plus, she could easily move it around the table as she worked her way around the top.

Once the paint was dry, Jill "reunited" the table with the chairs, and moved all of them to their new home on her back porch.
PROJECT RATING: Medium
To you watch Jill take you through the process, just click on the video player above.

